How to Replace a Copper pipe with CPVC Pipe in a Shower?
Are you considering replacing your bathroom’s copper pipe with a CPVC pipe? Great choice. Chlorinated Polyvinyl Chloride (CPVC) is a great material when it comes to pipes. Since I was remodeling my guest bathroom, I decided to replace the copper pipe of the shower with a CPVC pipe.
Like the rest of my guest bathroom remodeling series, I recorded my process to share with you guys. I have broken it down into simple steps in the hope that this helps you in your pipe replacement.
Before you start, make sure you get these tools.
Tools you’ll need

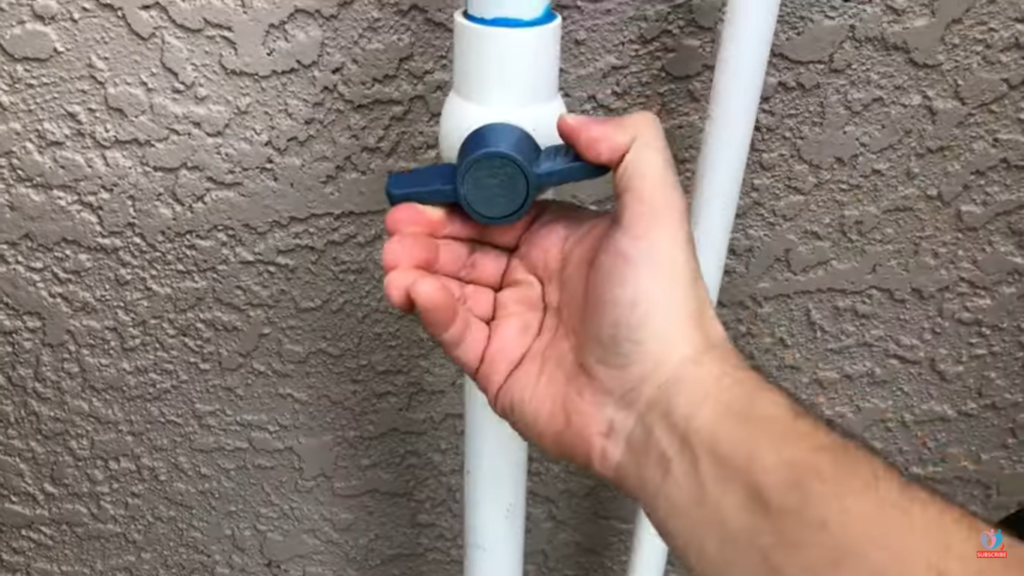
Step 1: Close the Main Water Supply Valve
To avoid making a mess during the changing of pipe, close the main water valve before doing any work.
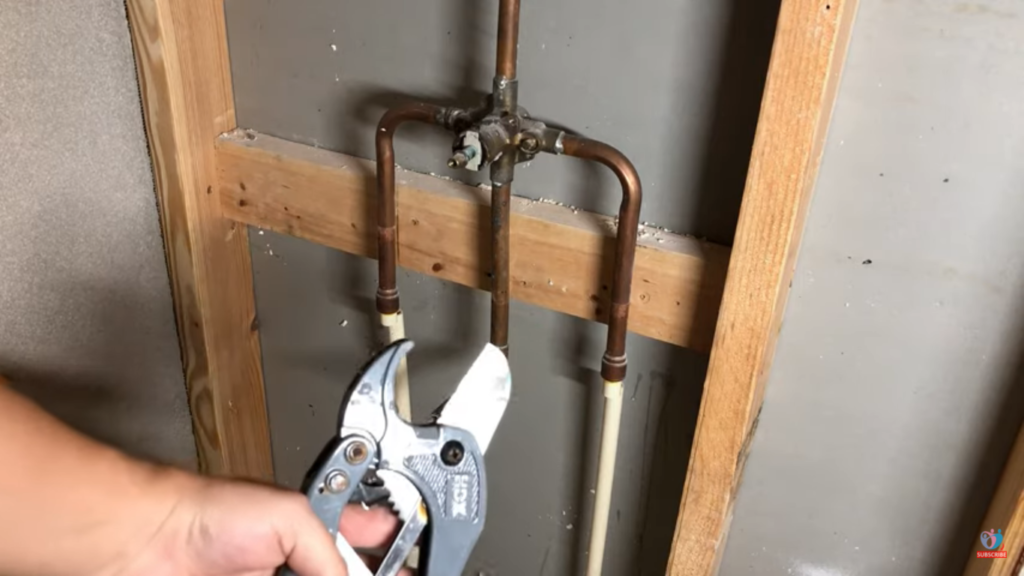
Step 2: Cut the Copper Pipe
To remove your old copper pipe you will have to cut it. Since most of the copper pipes are connected using either a portion of CPVC or PVC pipe, cutting those materials is easier than cutting copper.
Step 3: Pulling out the Screws
To take out the old pipe you need to remove the screws at the top of the showerhead fitting. This can be done in no time using a screw extractor.
The pulling out of the screw will separate the old copper pipe and the faucet valves from the wall which was previously installed.
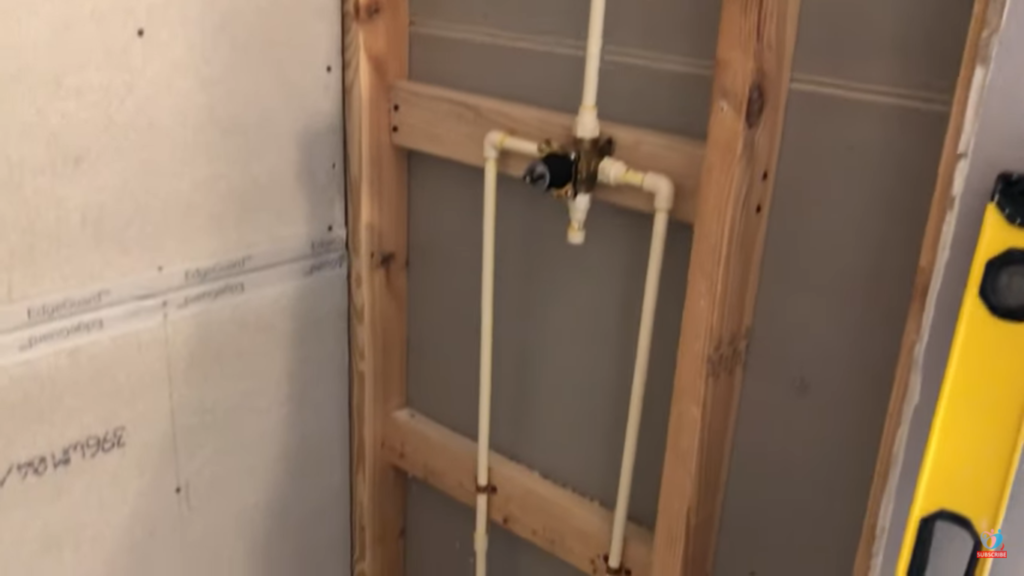
Step 4: Locate the exact point you want the Showerhead to be
Since in my case, I was replacing my bathtub with a shower system, the valve needed to be a bit higher.
Also, the showerhead needed to be at the right height. So I calculated that based on my needs. If that’s your case, you should estimate what would be the ideal height of your showerhead for your family.
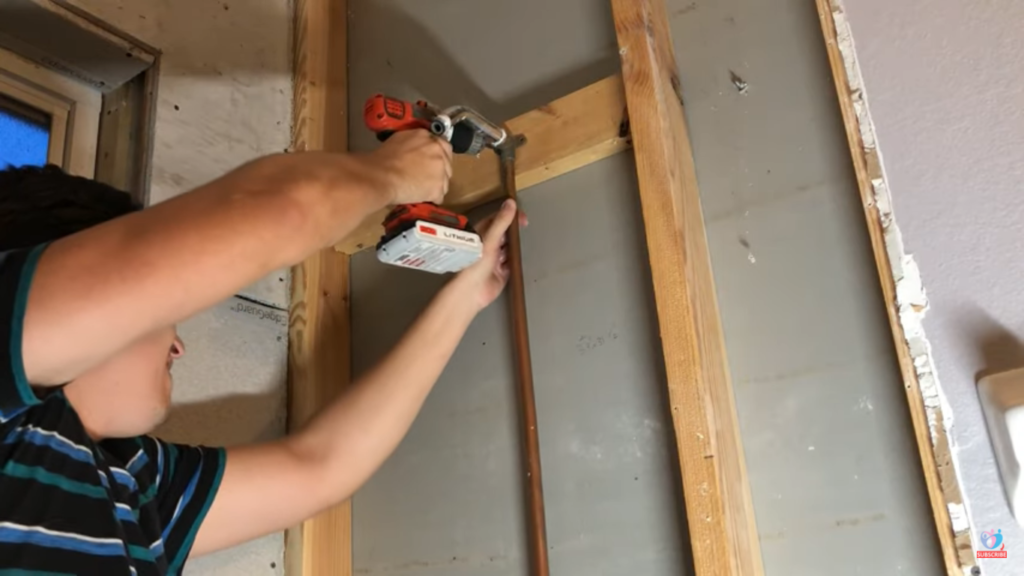
Step 5: Placing a Wooden Piece
Since I’m converting my bathtub to a shower, I need to make sure that my valve is high enough. So I added a a piece 2 by 4 wood in the appropriate height that I thought was good. I also made sure to that the shower head had a 2 by 4 at an appropriate height.

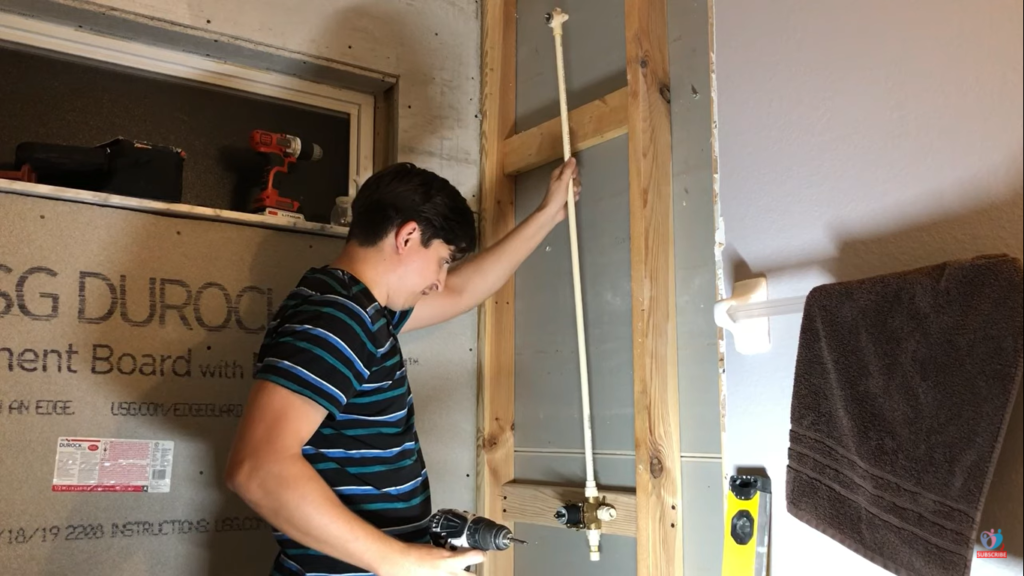
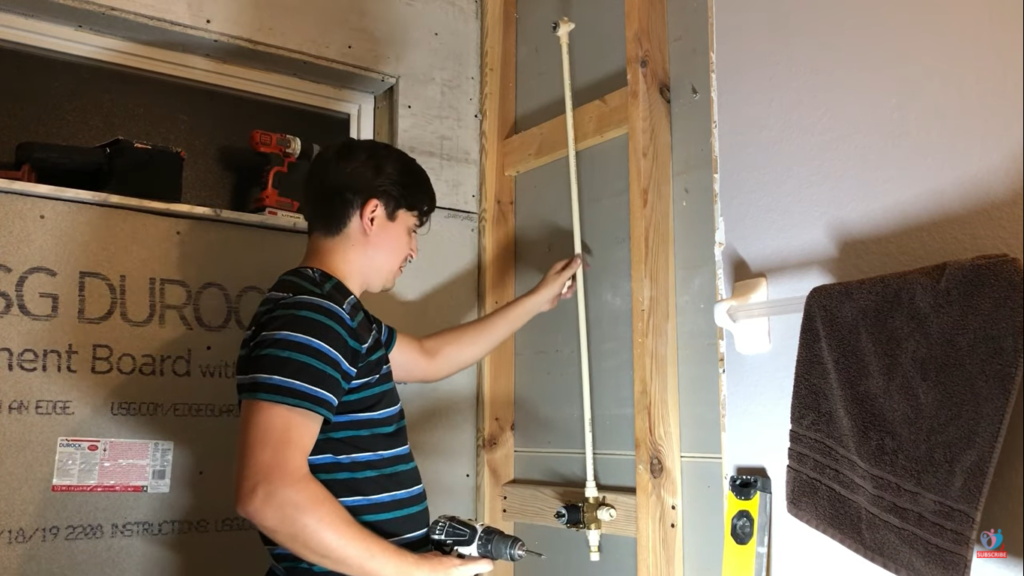
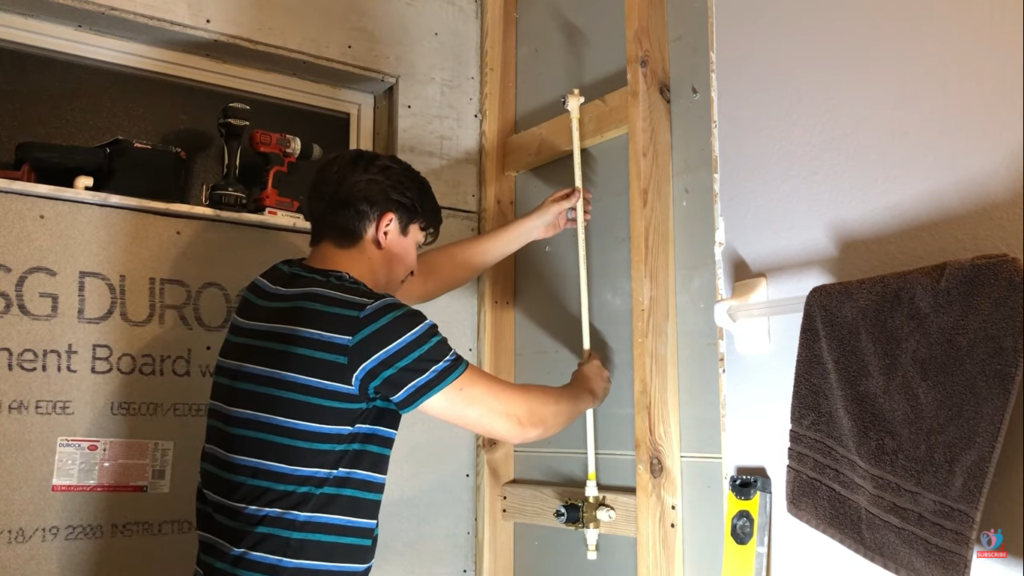
Step 6: Measure your CPVC pipe for Installation
The length of the pipe should be measured from the top of the shower valve. It’s okay to overestimate the length because you can always cut it later on.

However, if you cut it short beforehand, you will either have to redo the thing or use coupling which is going to look bad.
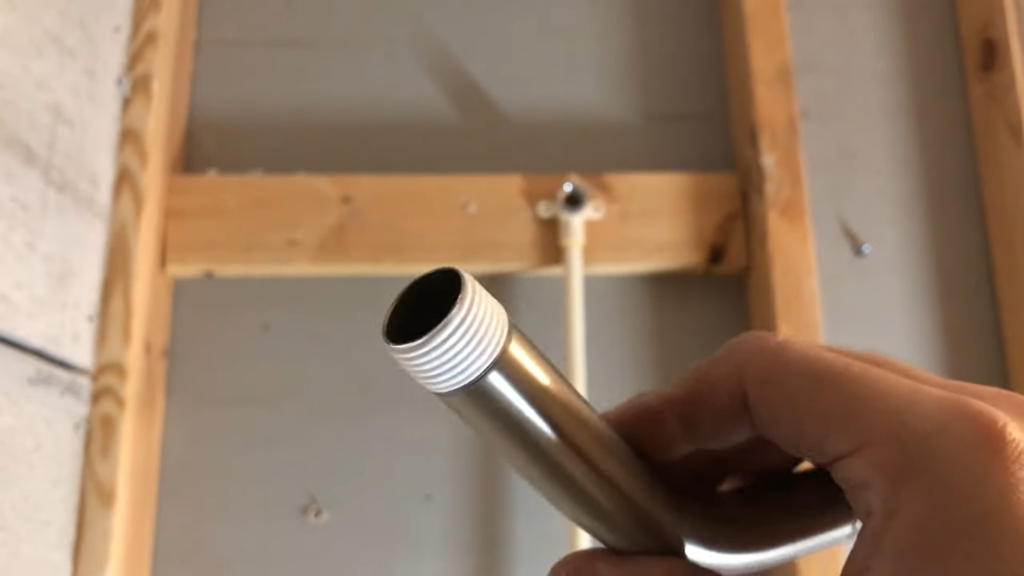
Step 7: Shower Head Fitting for the Shower Arm
I used the stainless steel threaded CPVC fittings because they are better and less likely to break.
You can also find the plastic threaded fittings but those can break and cause leakage.
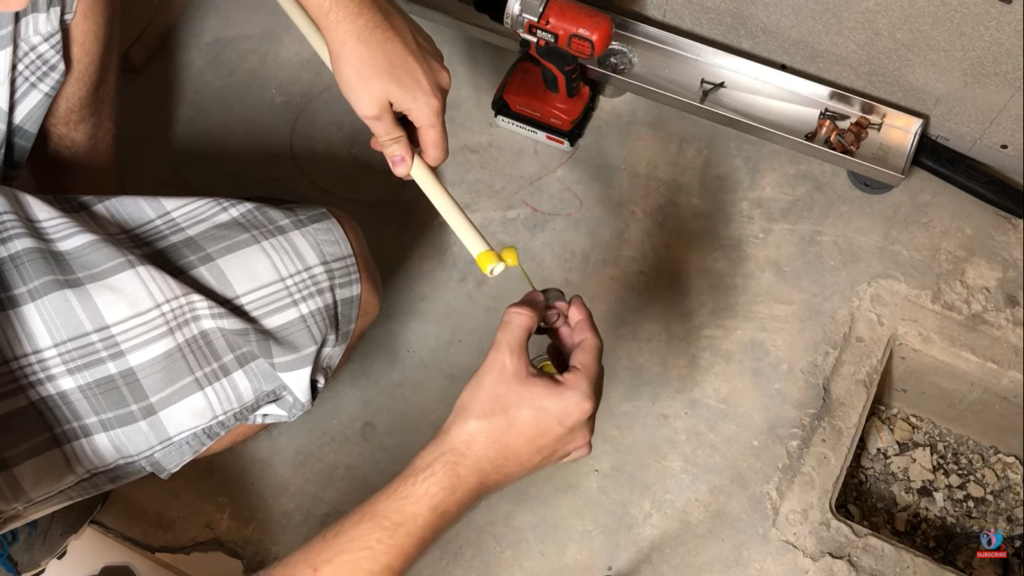
Step 8: Insert the CPVC Pipe into the Shower Head fitting
Before gluing the CPVC pipe into the shower head fittings, make sure you chamfer its edges. The glue I used and recommend is Oatey Medium Yellow All Weather One-Step CPVC Cement. Apply around the tip of the pipe where you will will stick with the shower fitting.

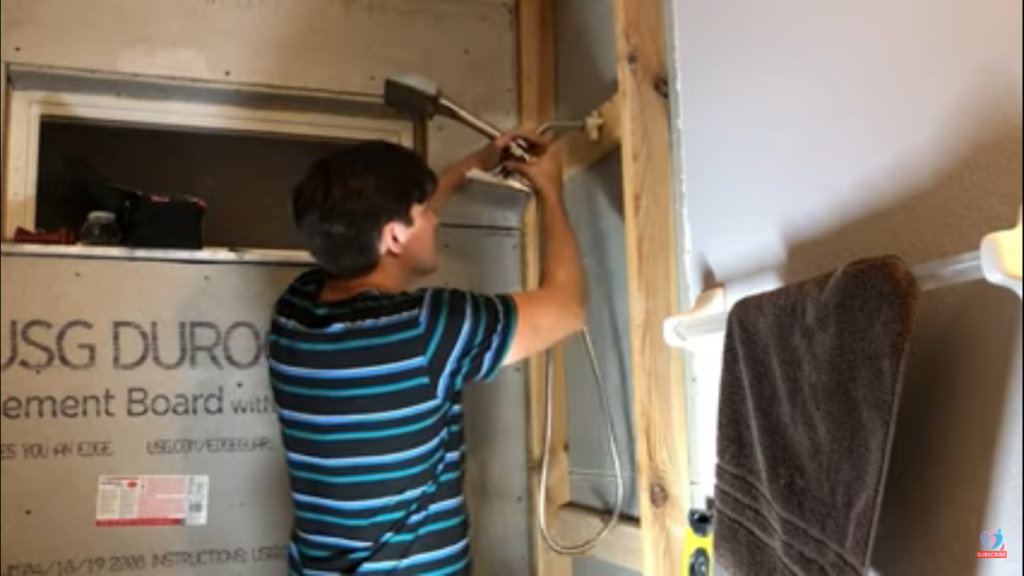
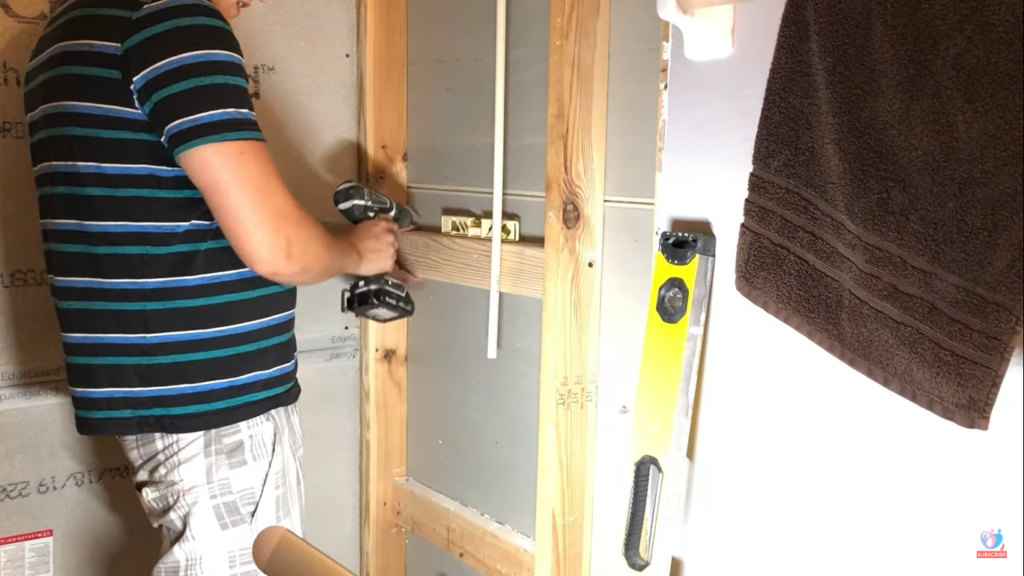
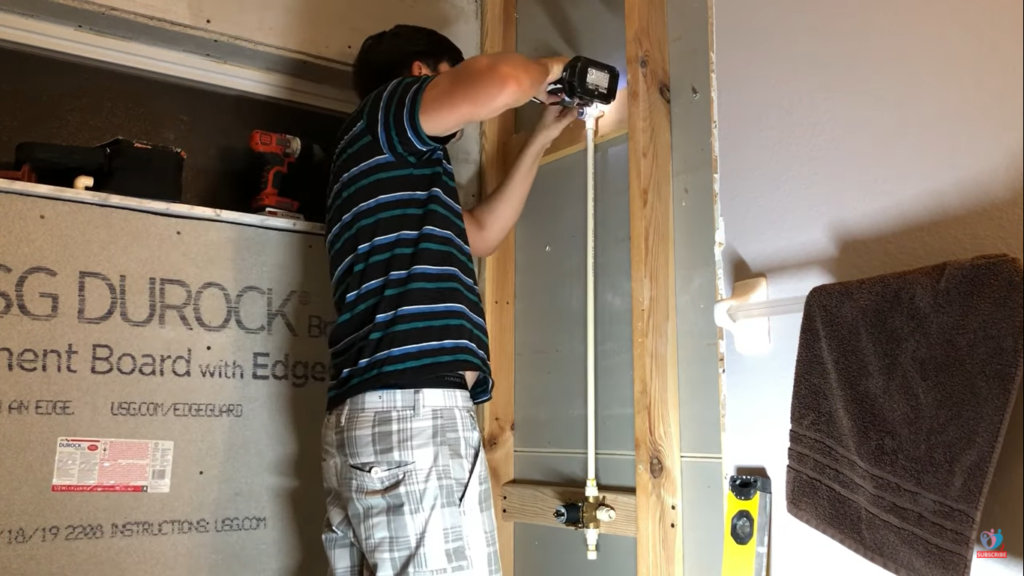
Step 9: Attach the CPVC Shower Pipe on the Wall
Now take that pipe and the fitting combination and attach it to the wall. Start by screwing the top of the fitting with one screw. This way you’ll have more flexibility and the assembly can pivot. I used regular drywall screws.

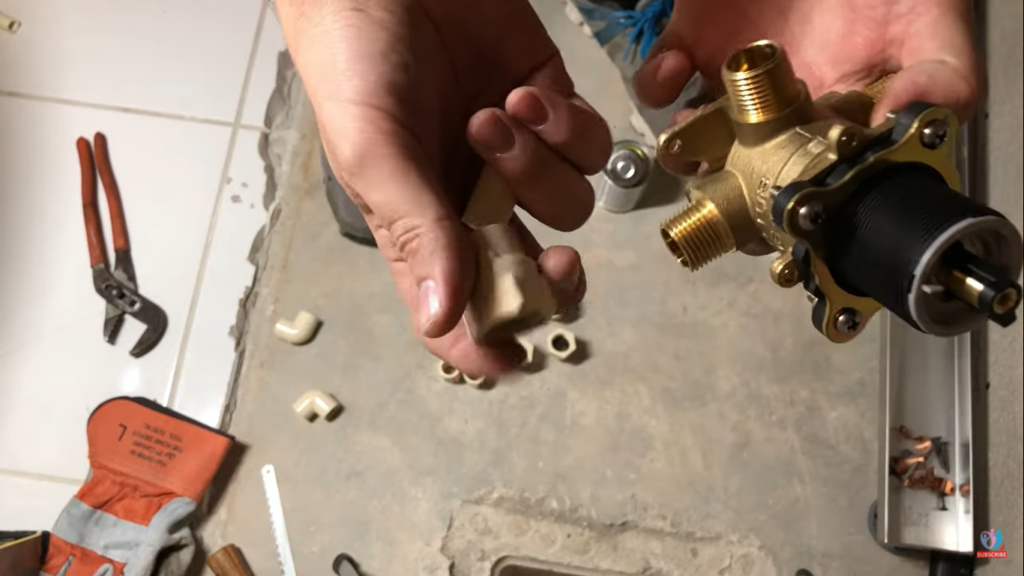
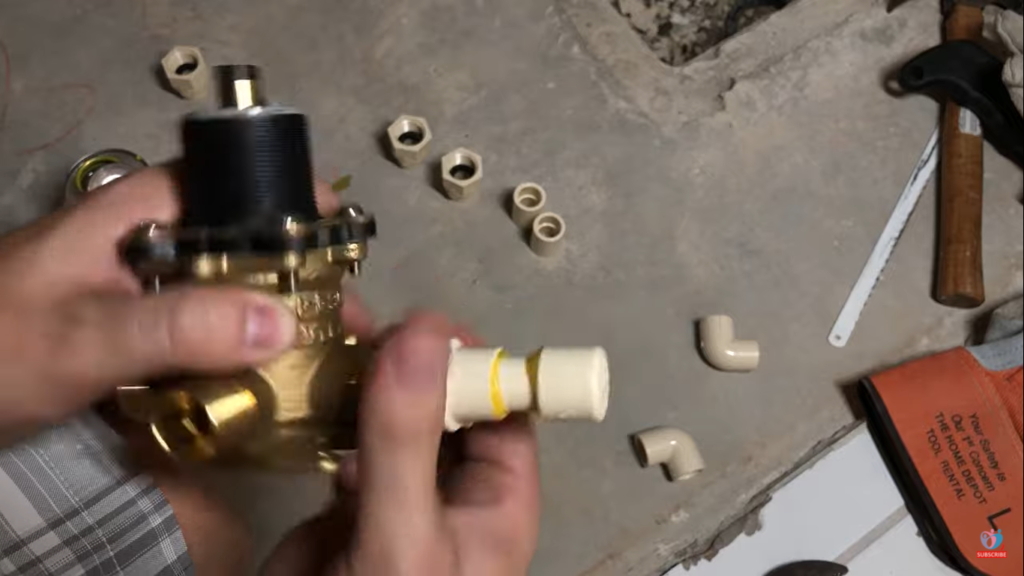
Step 10: Install a new shower valve
Take a new shower faucet valve, so you can thread its fitting for the adjustment of CPVC valve ports in it.
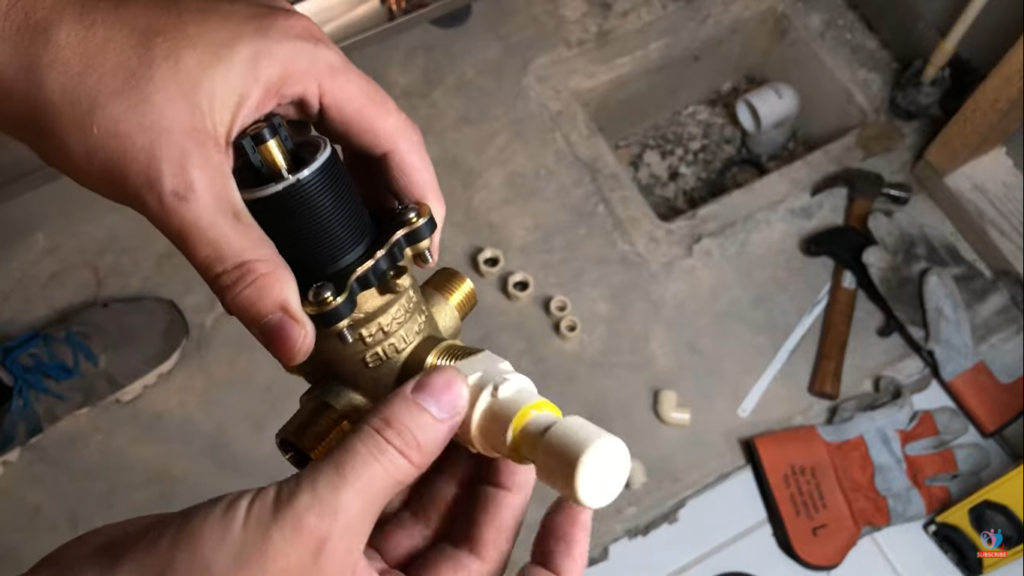
Step 11: CPVC Pipe Cutting
Since the bottom outlet of the shower faucet valve is designed for a bathtub, which we don’t need, we are going to close it. To do so, cut a small piece of CPVC pipe, apply glue to its one end and attach a cap to it.
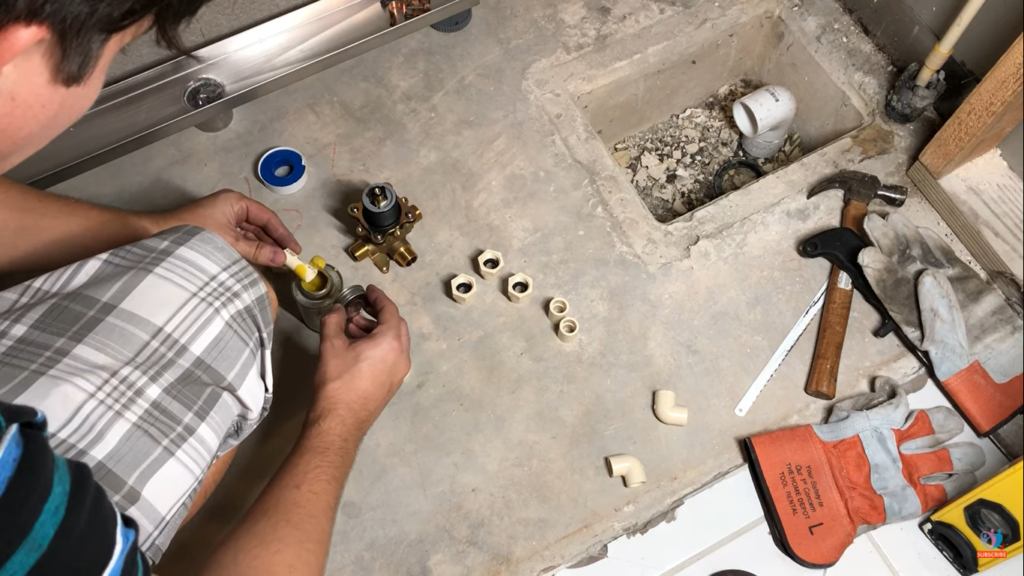
Now similarly, glue the other end to insert it into the bottom outlet of the shower faucet valve.
Then take that glued peice and thread it into the shower valve.
Before you do it, apply Teflon tape around the threads of the outlet. This helps prevent leakages. Usually 3 revolutions of teflon tape is plenty.
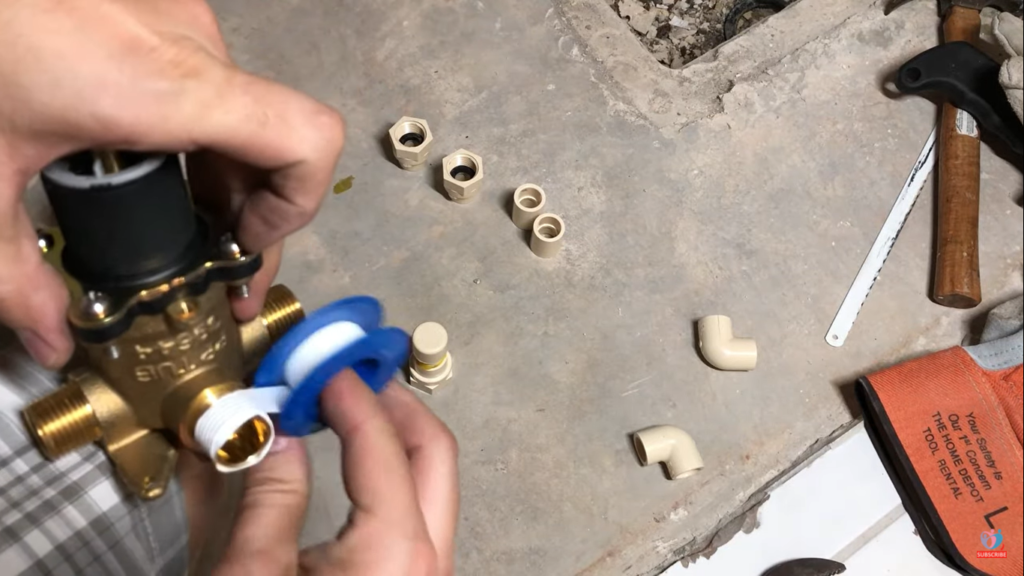
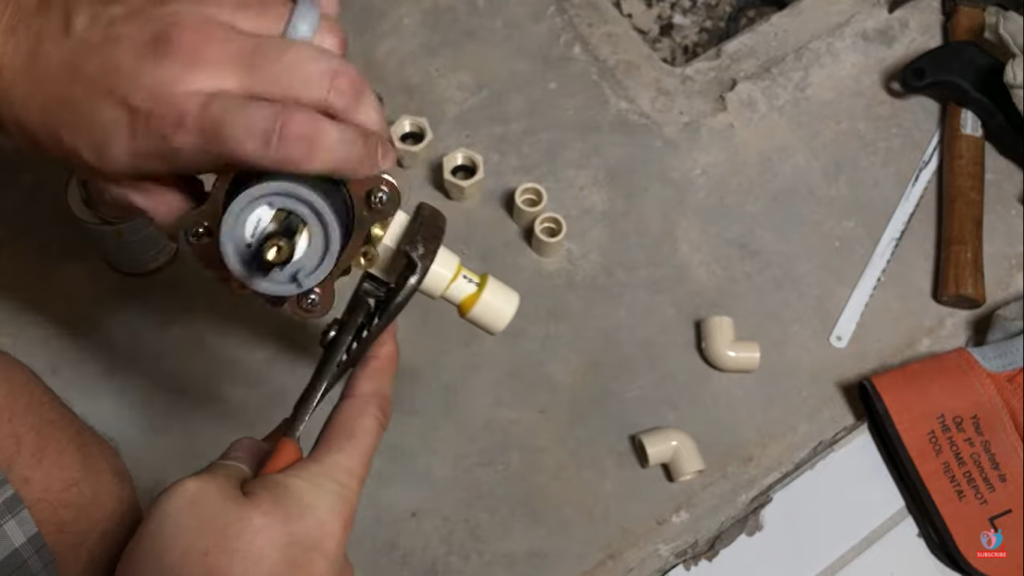
Tighten the capped piece you’ve just made to the shower faucet valve. It’s better to use a wrench to tighten it but since it’s plastic, don’t apply too much force or it will break.
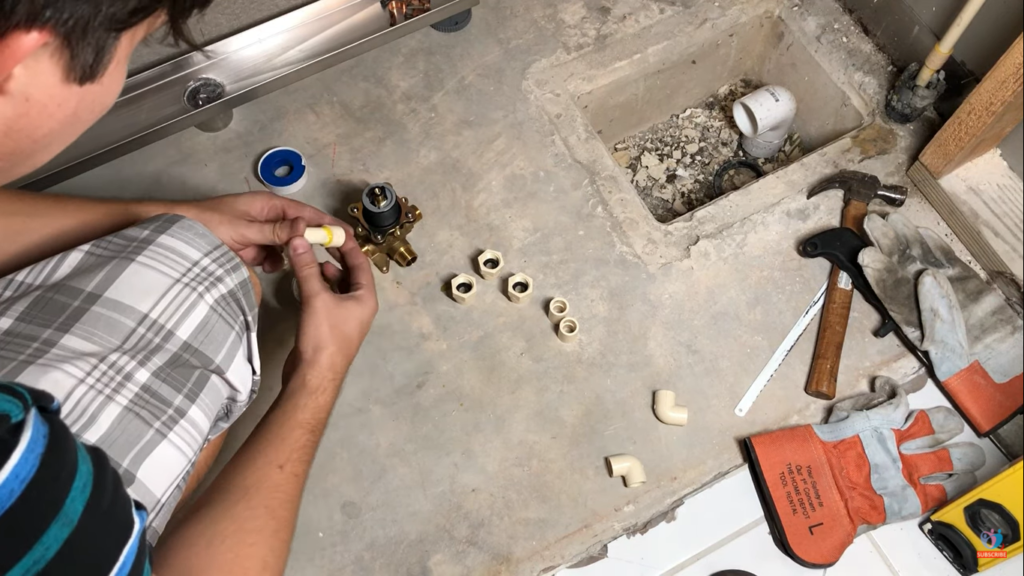
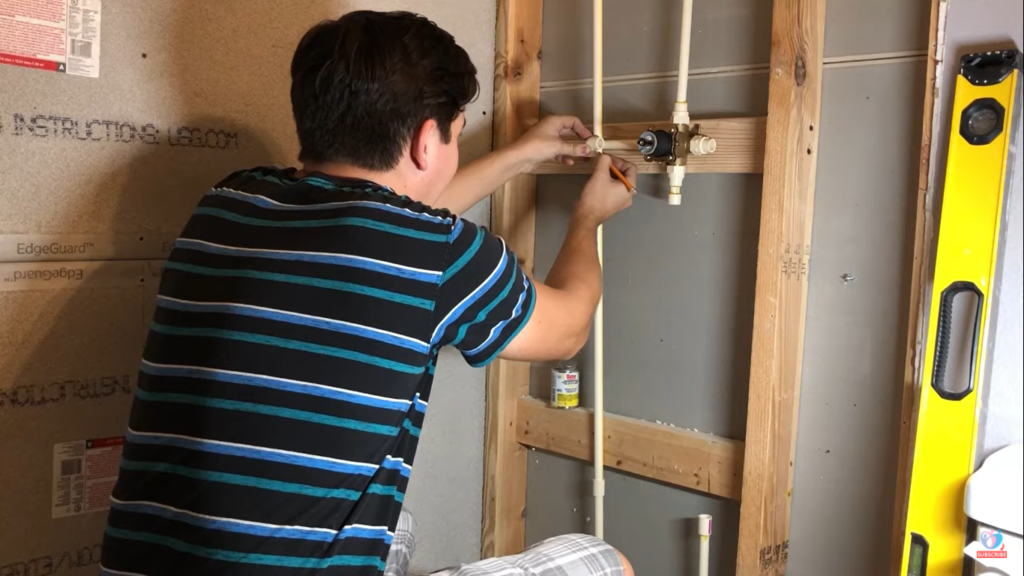
Step 12: Attach the remaining threaded fitting
To connect the remaining three fittings to the faucet valves and attach some CPVC pipes. Don’t forget to use the teflon tape before threading them in.

Step 14: Attach another 2 by 4 for the faucet valves
Just like the 2 by 4 attached above for the shower head, you need to attach another one for the shower faucet valve. Find the appropriate height and secure it with the help of screws wood screws. I used two screws on both sides.
Step 15: Screw the valve in the center of the 2 by 4 vertically in line with the shower head valve
Find the right spot for the shower valve. Make sure it’s vertically in line with the shower head pipe fitting. Otherwise, the pipe will be not straight.

Step 16: Remove the showerhead valve to observe the adjustments needed
Remember when we applied one screw to the shower head valve? We did so to make room for adjustments later on. Now that we have mounted the faucet valve, we can observe any changes required to the length of the pipe.

If you’ve followed my advice on step 6, you’ll have a longer pipe by now. This is good because you can simply cut the extra length to make it appropriate for the showerhead and the faucet.
Remove the shower head valve with the pipe, push the lower end of the pipe in the top valve of the faucet valves and then see where the shower head fitting falls. This will give you the right length to cut.
Step 17: Install the Valve Permanently and Pipe Adjustments
Cut the pipe if you think it’s a bit longer. Once you think that everything is in place, insert the pipe into the valve with glue and attach the faucet valve with screws. Now, attach the shower head with the three screws.
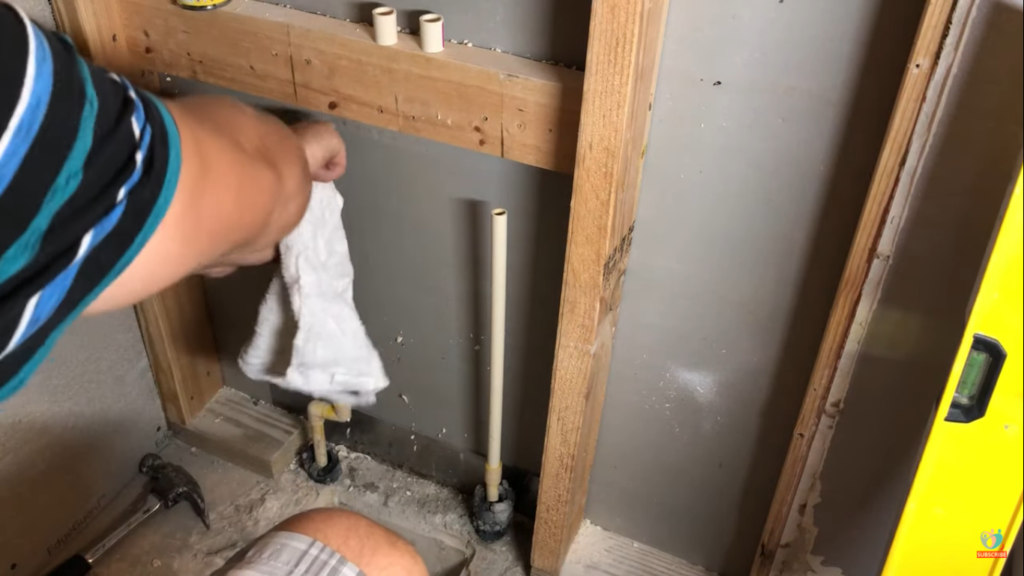
Step 18: Drying the Water Pipes head
Dry the heads of the pipe that supply water under the ground with a cloth. Drying will help you to glue them easily for coupling.
Step 19: Formation of Pipe Routes
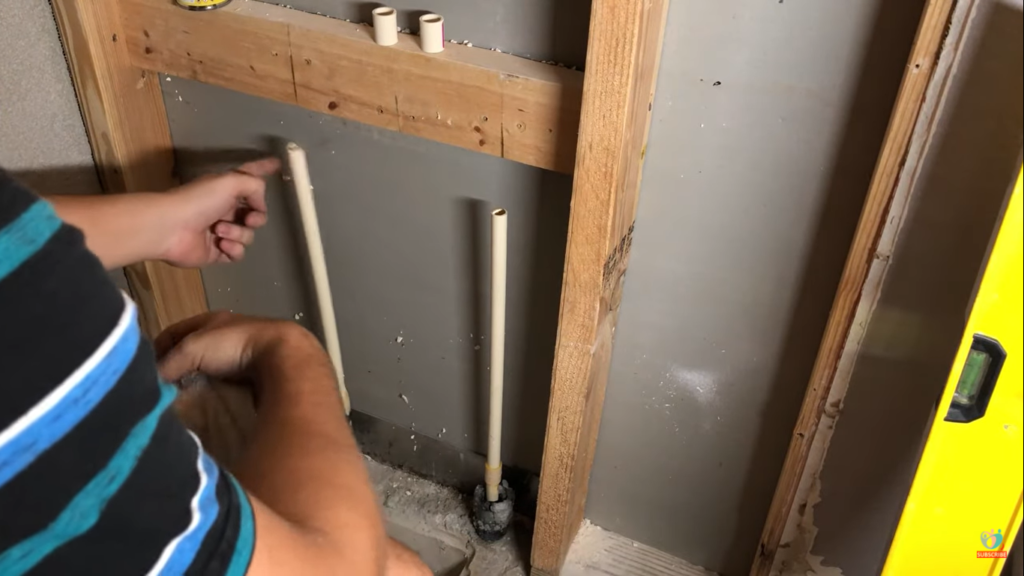
Measure the pipes to form a route using CPVC 90 on both sides to make one for hot and the other one for cold water towards the valve. I used the existing copper brackets to support the CPVC pipes.
Step 20: Attach the Shower Arm
Lastly, install a new shower arm pipe. If you are wondering how to install one here is a video.
Final Words
That’s it. Next you will need to install durock cement board which you can see how to do here. . In case you’ve found any inconsistency, let me know. Also, you may want to watch the video I made of all this process.
If you are converting your bathtub area into a shower area, you’ll also want to c the drains. Check out my article on, “How to Convert Bathtub Drain to a Shower Drain?”