How to install iSpring RO System
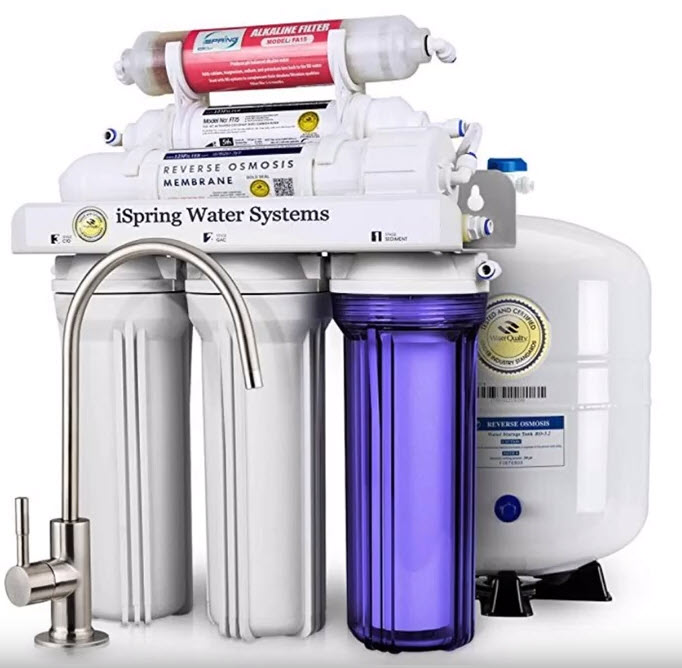
Among different Reverse Osmosis (RO) drinking water filter systems, iSpring is the best one. In this article, I will share with you how to install iSpring’s 6-Stage RCC7AK RO Water filter system step by step. This is the high capacity reverse osmosis water filter system which makes water cleaner and tastier.
This is the under-sink water filter system which can remove up to 99% of more than 1000 containment and it removes up to 98% of lead. iSpring’s 6-Stage RCC7AK consists of Alkaline Remineralization filter that provides healthy minerals creates balanced alkalinity. This is what makes the taste of this water filter system more natural than any regular filter system.
Apart from these, it comes with premium quality components which make it more reliable and it requires very low maintenance as compared to other filtering systems. If we talk about its installation procedure, it is very simple and easy. You will not need anyone for the installation as you can do it yourself. With its package, you will get everything you need for the installation other than a few tools that you will need for the job.
With this step by step installation procedure, I have a YouTube video, explaining how to install this iSpring’s 6-Stage RCC7AK drinking water filter system. You can find the video at the bottom of the page. Consider the following factors:
Difficulty Level: Easy
Time: A couple of hours
Cost: Around $200
Tools You’ll Need
These are the tools you will need to get started with the installation procedure.
Instructions to Follow
Follow the below-given step by step procedure for installing your water filter system without any hassle:
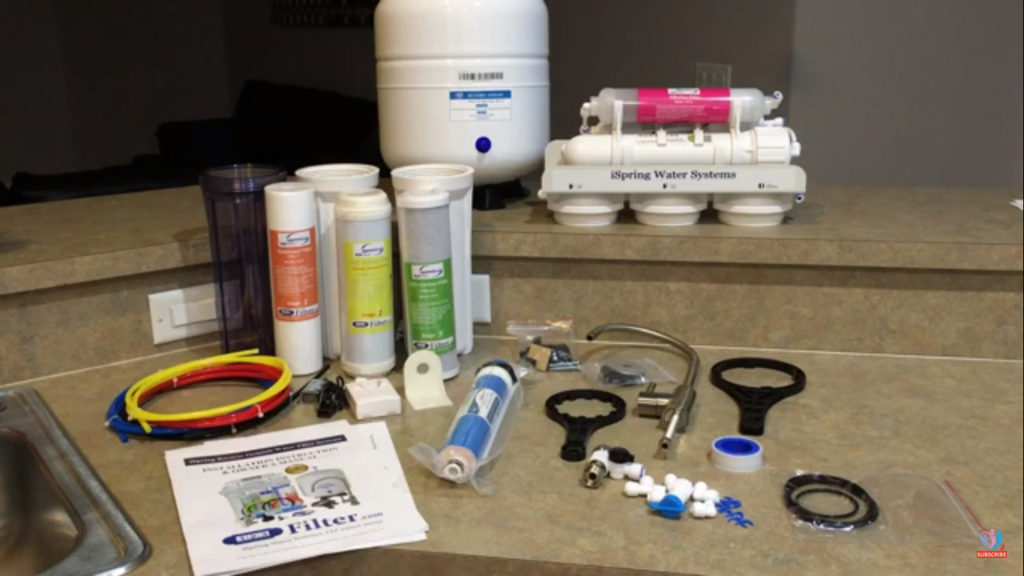
STEP 1: iSpring 6-stage RCC7AK Reverse Osmosis RO Box Content
Before you begin the process of installing, lay out all the components you have received in the package. This will make it easy for you to find any of the items you need for the installation. Also, make sure you check out each of the components you have received. Verify with the manual that was in the box and make sure you have all the components. To see my unboxing video, click here.
iSpring RCC7AK RO Unboxing video
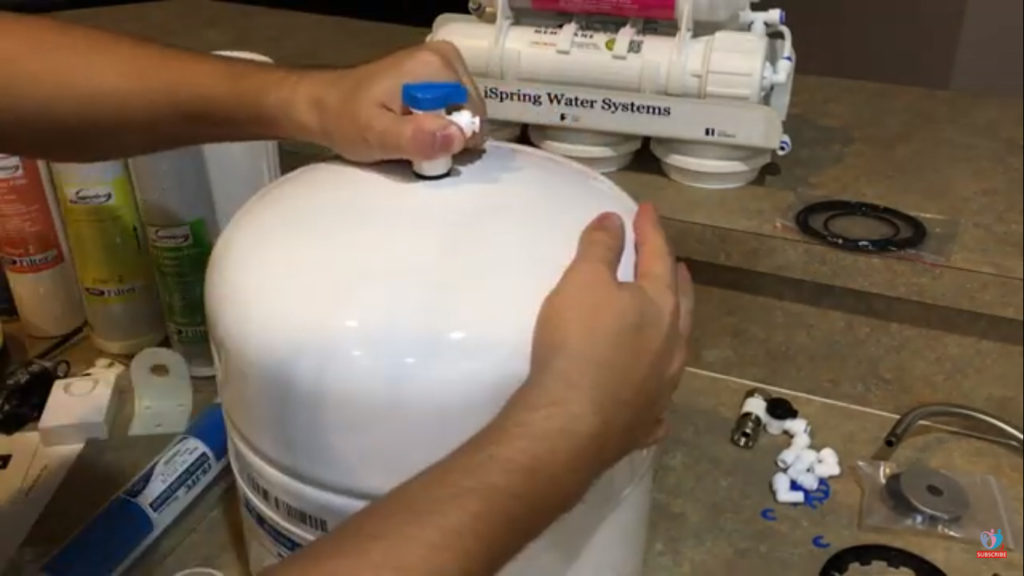
STEP 2: iSpring 6-stage RCC7AK Reverse Osmosis RO Tank Valve Installation
Now, first of all, take one of the valves and pressure tank from all the components you have. Now, take Teflon tape and wrap it around this thread in such a way that in the same direction clockwise that you’re gonna be threading this on and tighten it properly. Typically 3 revolutions is more then enough of Teflon tape.
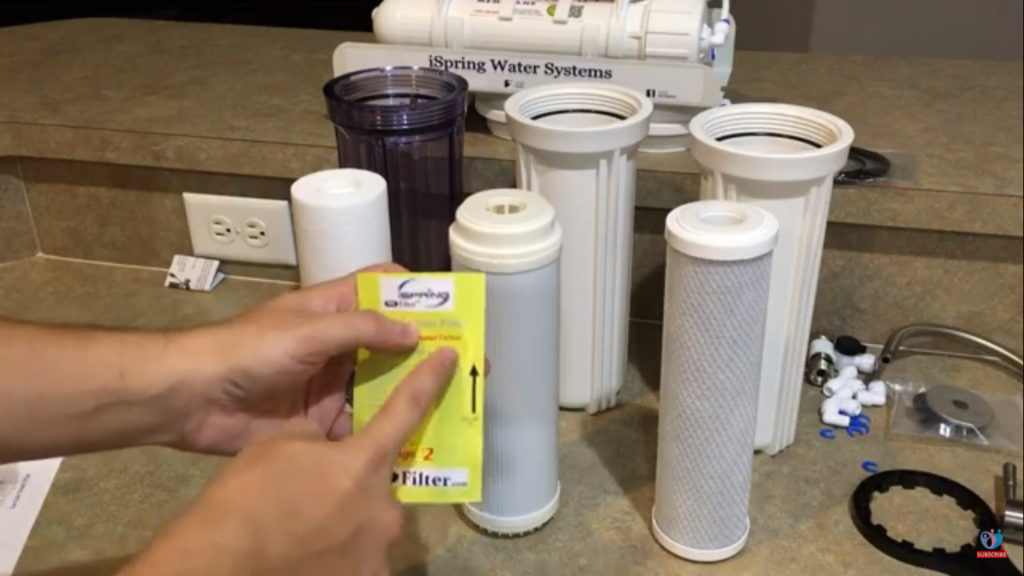
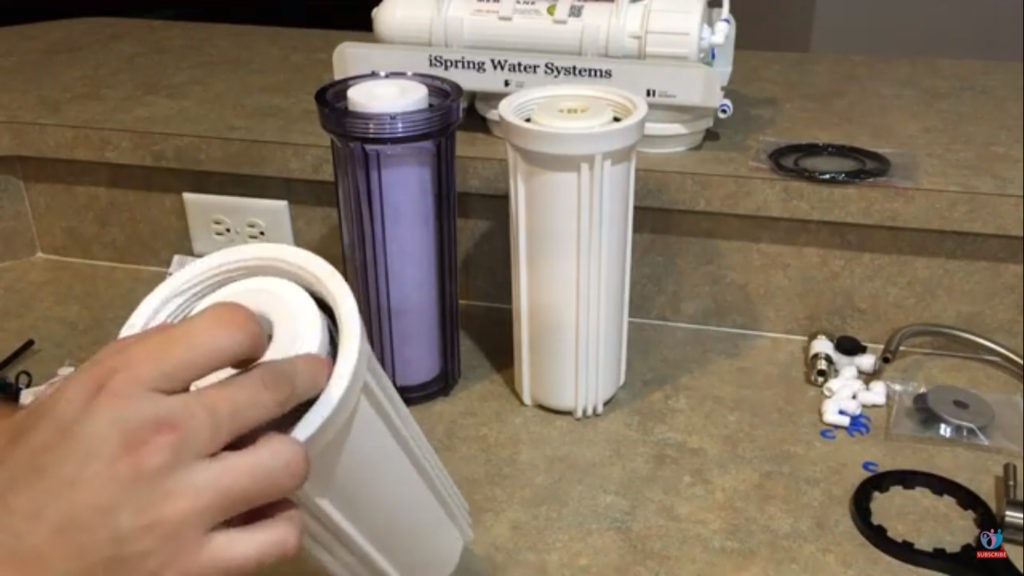
STEP 3: Filter Element Preparation
Now, unwrap all the reverse osmosis filter elements but pay attention to GAC (Granular Activated Carbon) carbon filter which has a directional arrow that shows flow direction.
Now center all the three filters. Be careful about the rubber seals in the filters, they might come off if you mess with them. While you installing keep in mind to have replacement elements ordered ahead of time.
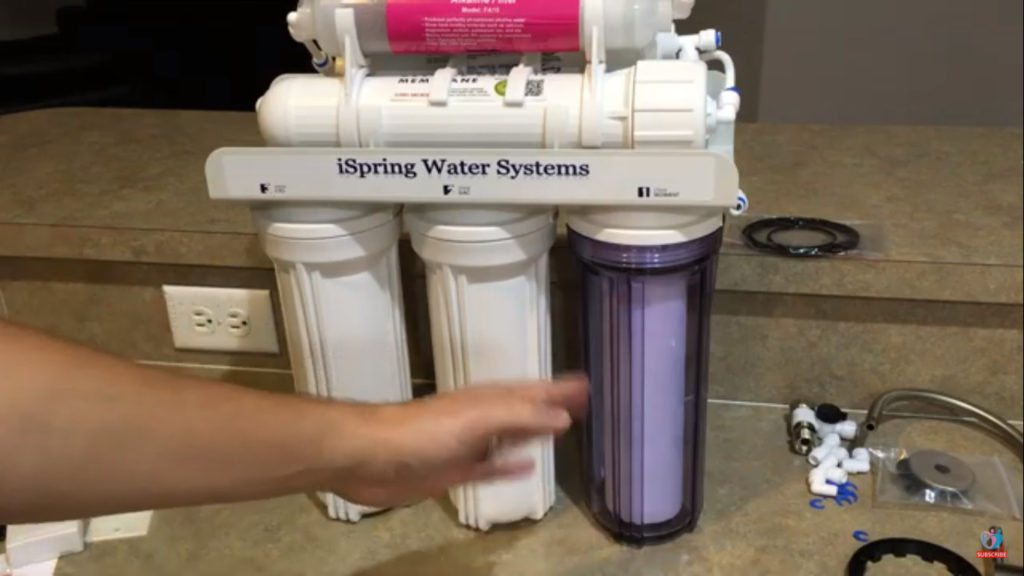
STEP 4: iSprings Reverse Osmosis Filter Housing Installation
Once you center all the three filters, the next step is to take screw them into the manifold from the bottom. Slowly try to align the filters in the center you can screw one at a time. Before aligning it, make sure you are placing the right filter in the right position. 1. is your sediment filter, 2. is your GAC filter, and 3. is your carbon block filter. The filters should be labeled for easy of installation.
If you make a mistake here and if the filters get swapped, your carbon filter would have seen all the dirt first therefore when it would clog up much quicker versus you have the sediment filter first catching all the debris, dirt, rust and etc. Then your GAC and then your block carbon.
The filter housing can be hand tighten but if you need further assistance, use the plastic wrench that came with the RO system. But make sure you do not tighten it so much because it would make it difficulty when you have to change the filters out. Typically you would want to replace these filters every 3 months. If you have really clean water coming into your house then maybe every 3-6 months. You can order the iSprings Replacement Filter Kit here.
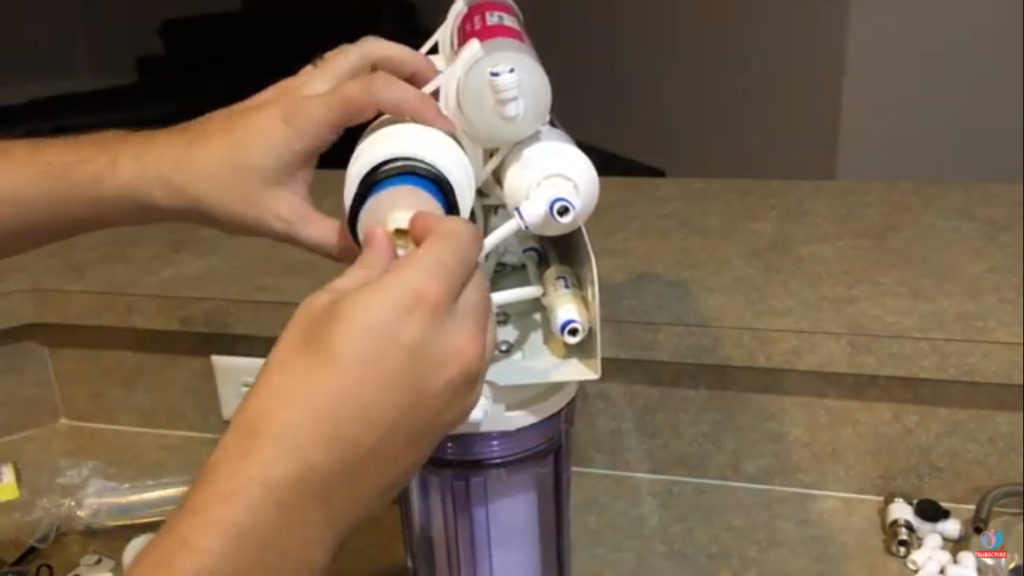
STEP 5: iSpring RCC7AK RO membrane installation
Now, follow the process of installing the reverse osmosis membrane. Don’t take out the membrane right away until you are ready to install it. Remove the black caps from both the ends of the membrane. Install the membrane into the housing, the end with the two black O-rings on the small tube go in first. Make sure the membrane is pressed firmly into the housing. Install the cap and tubing. Inside the cap there is also an O-ring. Make sure that is in place properly so you don’t damage it and to prevent any future leaks.
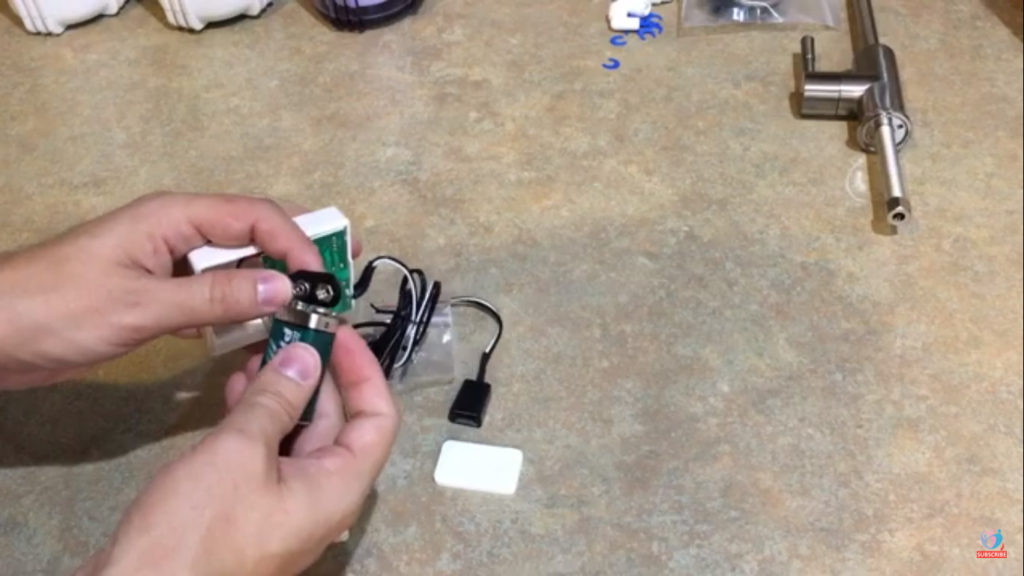
STEP 6: iSprings Water Leak Detection
The system comes with a water leak alarm probe. The probe has two contact points to which when the water touch them it makes a complete circuit and a loud annoying alarm goes off. It can be used to prevent any future leaks under your sink.

The main thing you have to do is open the back, put in the 9-volt battery, close it and screw in the back.
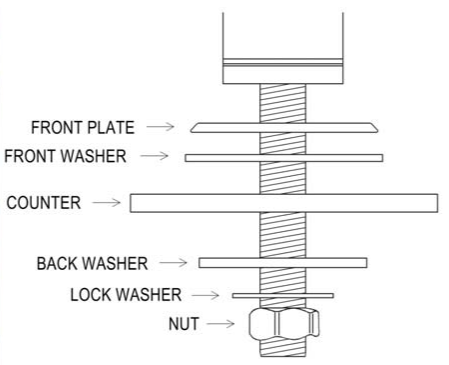
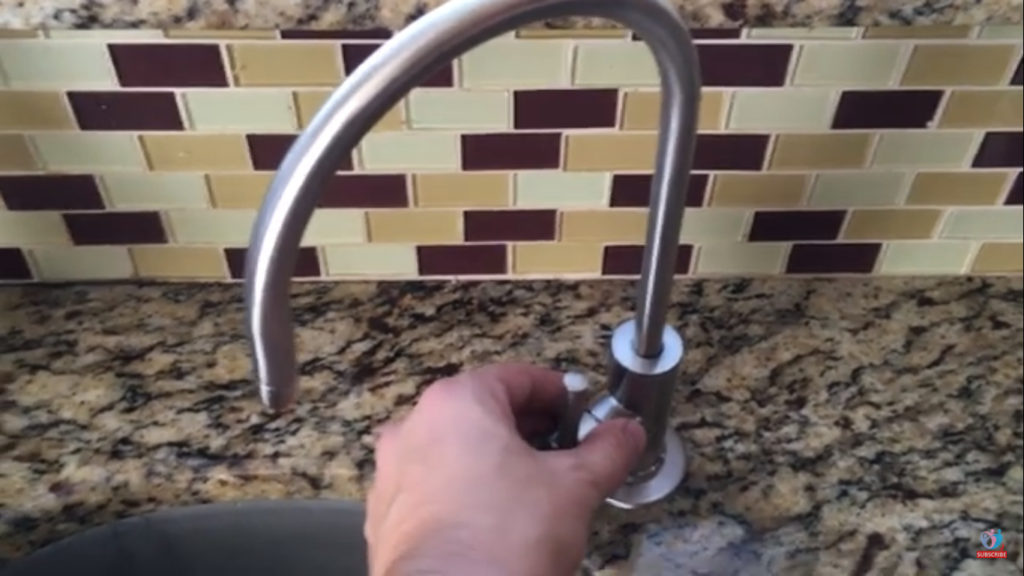
STEP 7: Installing iSpring Under the Sink RO Faucet
Before installing the RO faucet you will have to make a hole near your kitchen sink. I had an existing hole from a soap dispenser that I used but just make sure the hole is big enough to fit the threaded part of the faucet. Take the small faucet that came with the Reverse Osmosis system and remove the nut and place the front plate and front rubber washer on to the threaded rod. Install the faucet into the hole in your counter top and there will be a nut that already has the washer attached to it. Make sure you tighten that really well by hand so that the faucet is nicely secured.
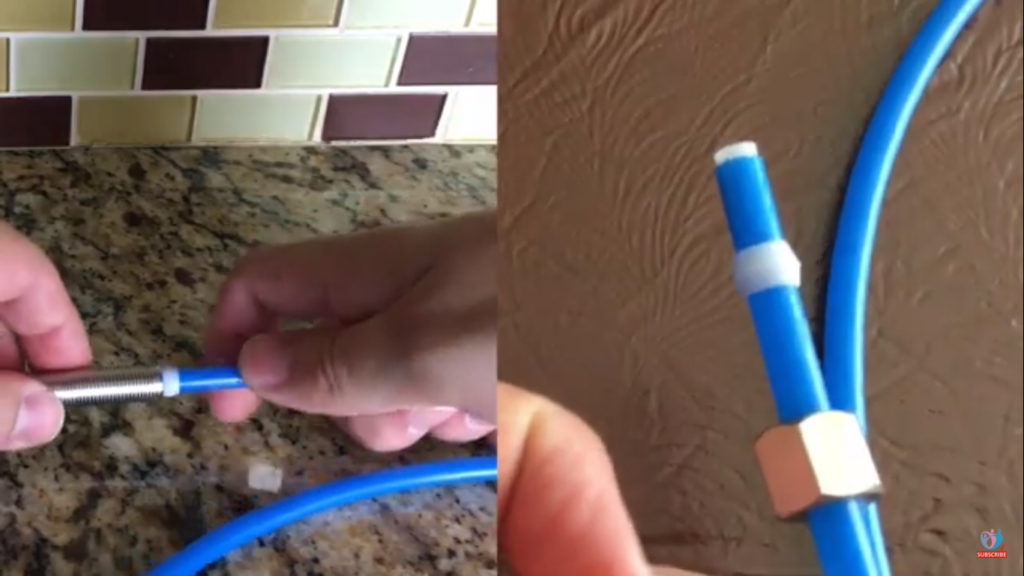
STEP 8: Faucet Tubing
After completing this, now you need to attach the blue tubing to the faucet. To get started, first you have to put the nut on the tubing, then plastic collar ring and then fitting inside the tubing. Install the faucet first before connecting the tubing.
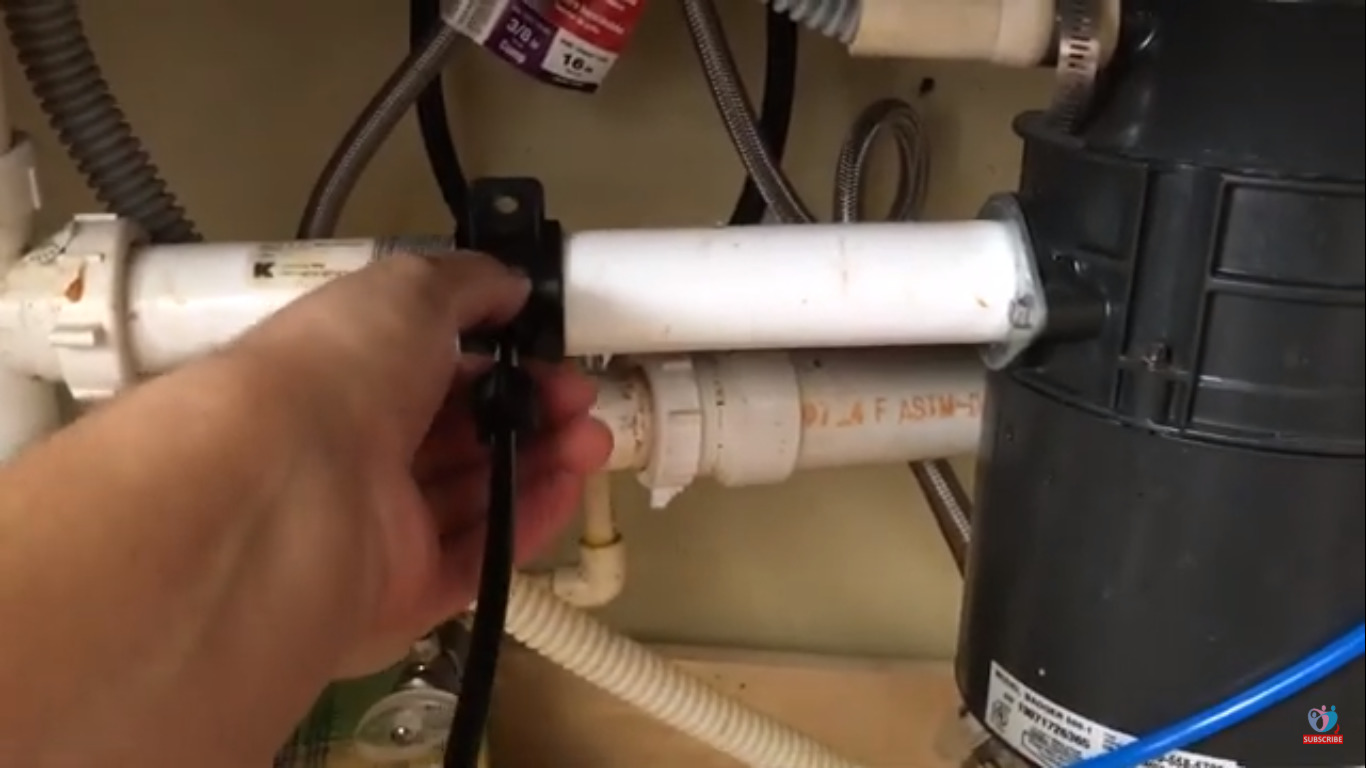
STEP 9: iSpring RO Drain Line Installation
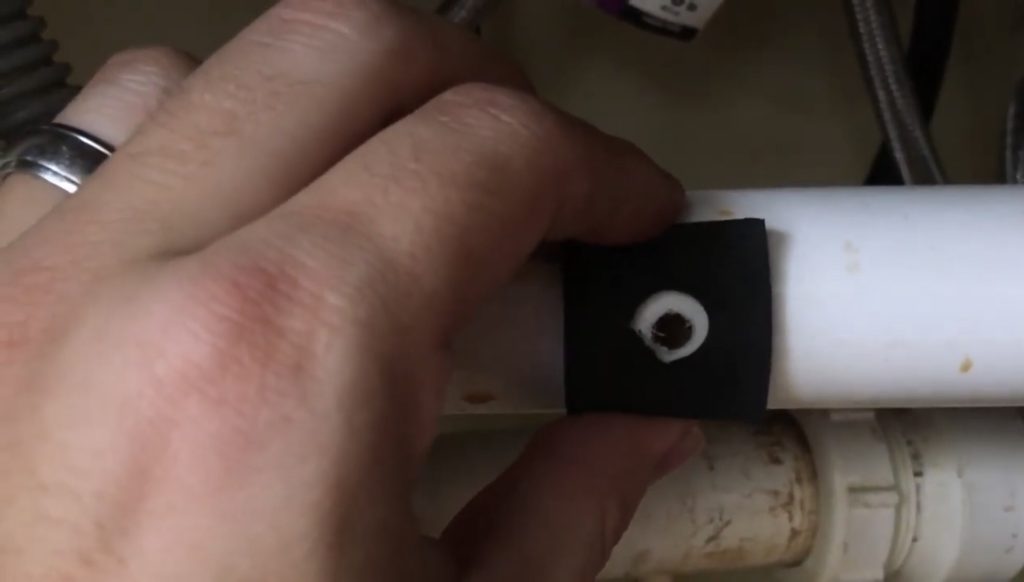
Take the drill that matches the size of the tubing. Drill a hole into the horizontal section of the sink drain pipe. Once you complete drilling, make sure the tubing fits perfectly.

STEP 10: iSprings Drain Saddle Installation
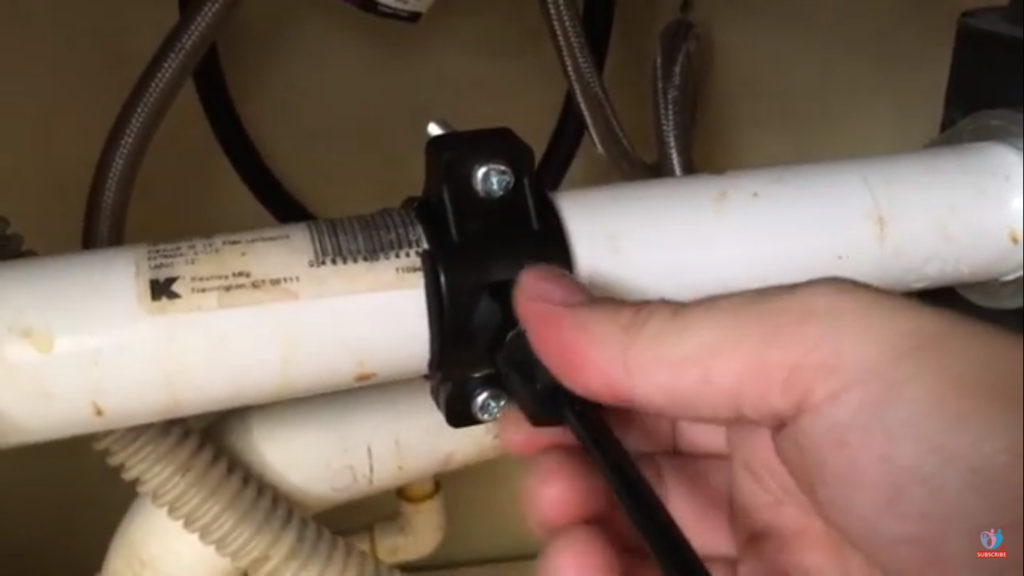
Now you have to install the saddle. To start the process, first put the gasket l around the hole as shown below. The gasket has an adhesive backing so make sure to clean the surface prior to installing it. Place the saddle with along with the tubing and then tighten the bolts to make sure the saddle is secure.
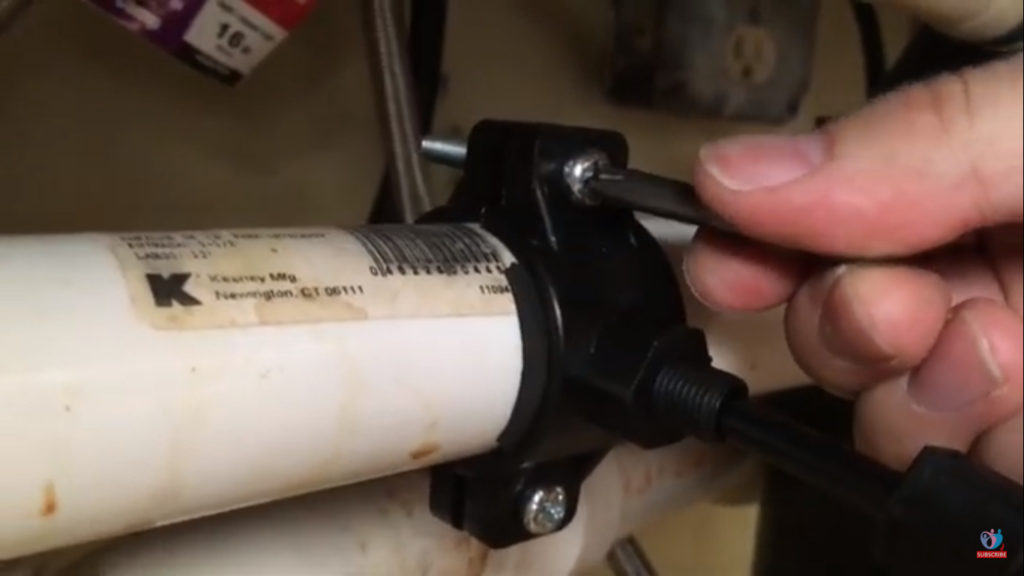
Then, screw in the fitting to hold the tubing in place.
STEP 11: Installing iSprings RO Feed Valve
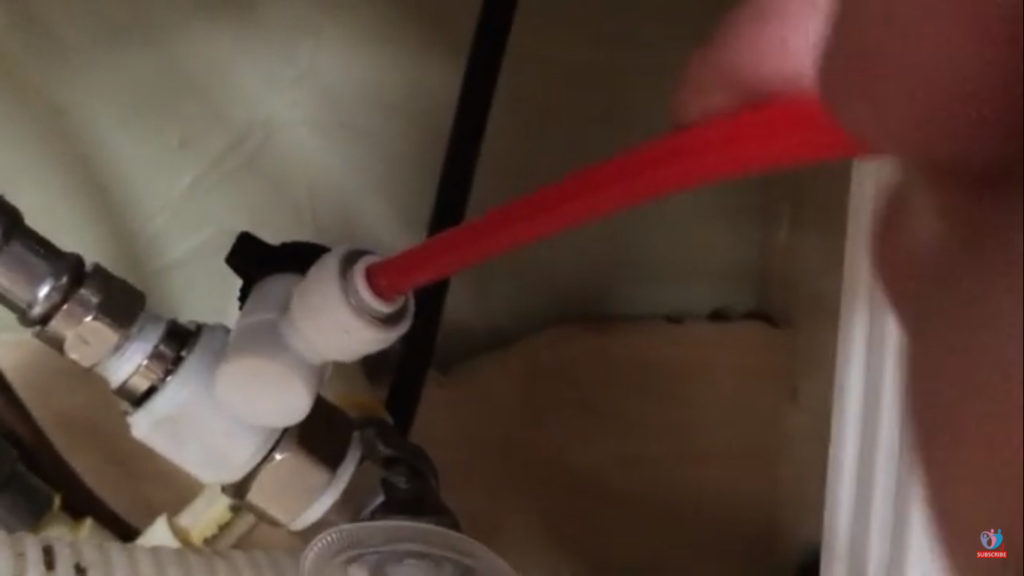
Now, install the white valve on the cold water feed to your sink. It will be between the shutoff valve and the hose that goes to your cold side of the sink. During this process, make proper use of Teflon Tape on the connections. Remove the blue clip, insert red tubing and reinsert the blue clip. (See instructional video below for additional assistance).
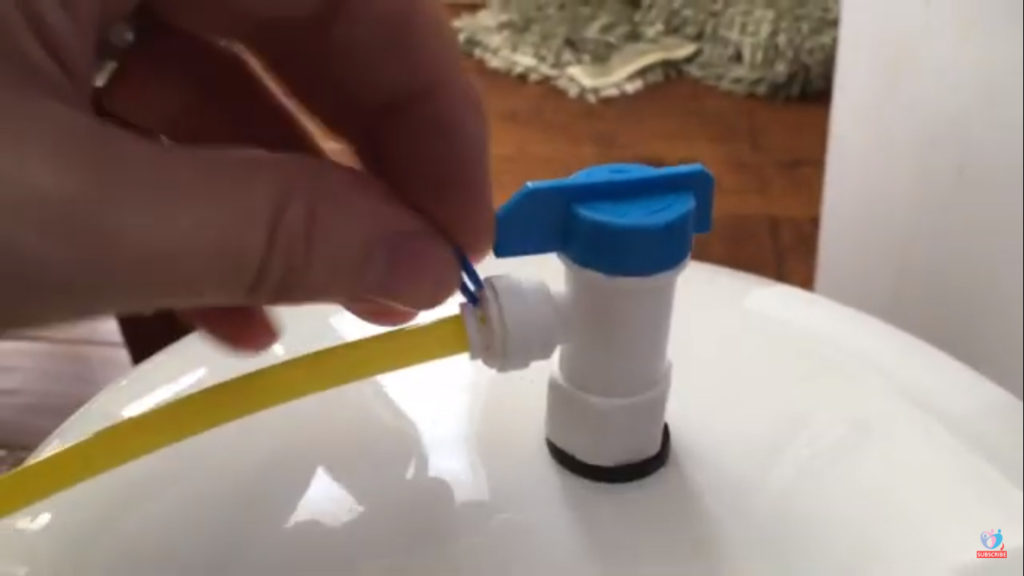
STEP 12: Installing yellow tubing into the iSpring Pressure Tank
After inserting the red tubing, install the yellow tubing on the top of the pressure tank by removing the blue clip, one you inert the yellow tubing, again reinsert the blue clip.
STEP 13: Installing the remaining tubing to iSpring 6-stage RCC7AK Reverse Osmosis RO System
Position your RO system and under the sink location and remove all the blue clips from the connection points that are installed.
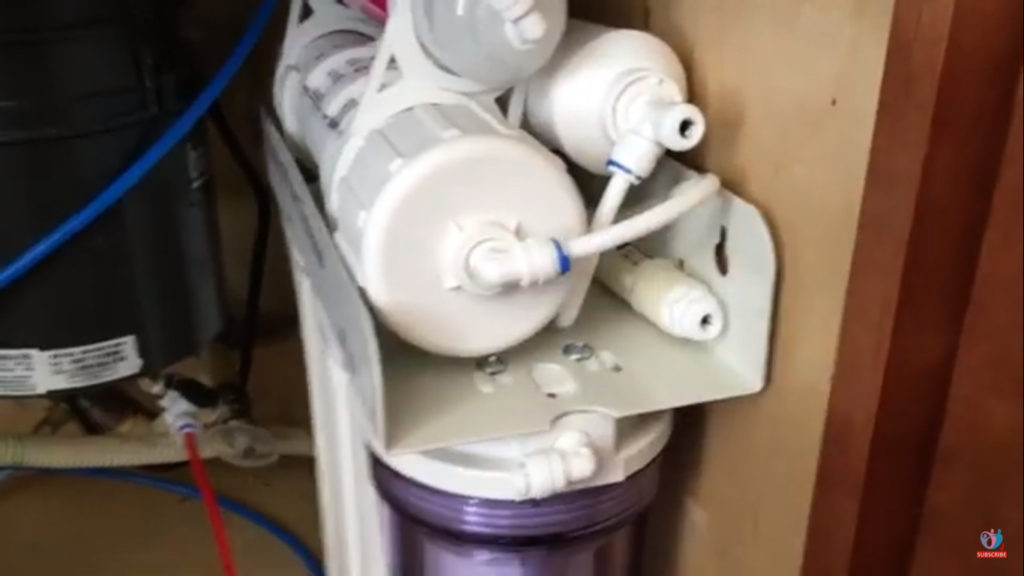
At last, hook up all the tubing colors shown as per the image is given below:

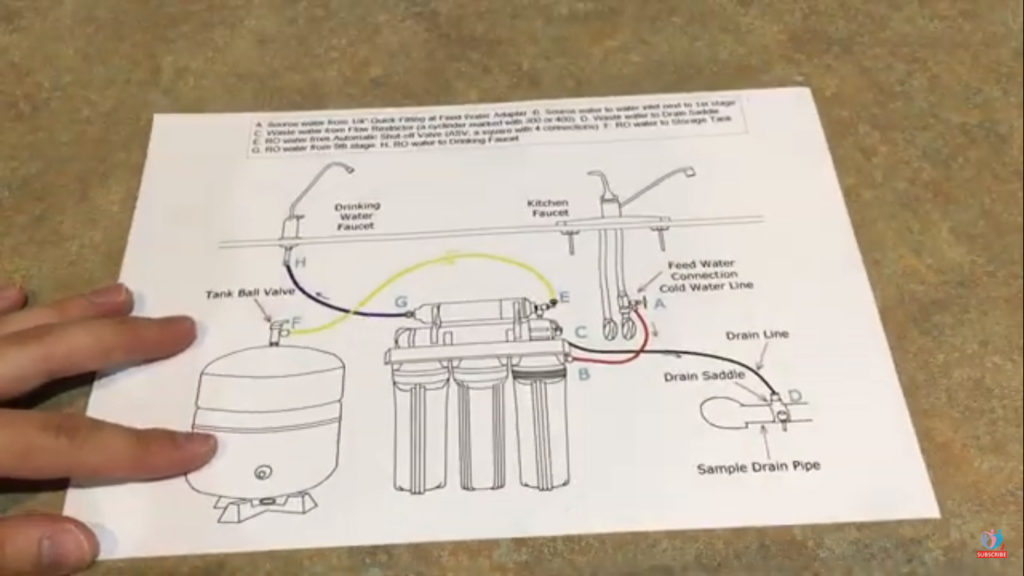
iSpring 6-stage RCC7AK Reverse Osmosis RO Diagram
If you are still stuck somewhere, refer to the below-given diagram:
Congratulations! You have successfully installed your iSpring 6-Stage RCC7AK Under Sink RO Drinking Water Filter System. If you have any questions, ask us from the comment section below.
For Full Detailed Video Instruction, please check out this video below:
Other Helpful Under the Reverse Osmosis System Resources
- How under the sink reverse osmosis system work
- Under the sink reverse osmosis replacement filter elements overview
- How to replace under the sink reverse osmosis filter elements
- How to replace under the sink inline carbon filter
Follow My Journey
Read another article: How to replace headlight bulb on Audi Q7?